


Make Your Own Double-Prong Italian Vegetable Tanned Leather Belt!
Always wanted to try new hobbies? Don’t worry, Tanner Leatherstein is here to help! He will walk you step-by-step on how you can create your very own double-prong leather belt! There’s a bonus PDF template* that you can freely use for the project.
* You may see the PDF template in the description box on the YouTube video.
Let us know about your thoughts, questions, or recommendations. Which leather goods do you want Tanner to teach you next? You can comment them down below or directly on the YouTube video. We’ll see you again next time. A quick reminder to be authentic, be leather-savvy!
TRANSCRIPTION / WRITTEN ARTICLE
Hello, everyone! Today, I would like to make a double-prong heavy-duty work/holster belt together with you from scratch. The idea came along because I found this belt that I made about three to four years ago when I was experimenting with different buckles. Some customers were asking about double-prong belts. Now, I thought that it was time to do it again from scratch to show you all the materials and steps that I follow when I’m designing a new belt so you can do it yourself whenever you want using the PDF included down below in the link. It’s completely free. You download it, get the needed materials, follow some of our recommendations about leather selection, and make your own belt at your own convenience.
Alright, let’s get into the list of items and tools to get this work done. Here’s the list:
- Leather
- Buckle
- Chicago Screws (We’ll use it for the design to close the buckle.)
- Leather Staple (To make your loop if you want to.)
- Leather Strap Cutter
- Basic ruler
- Marking Awl
- Hammer (Comes very handy when you’re working on thick leather.)
- Punch Tools (For your prong holes.)
- Basic Leather Puncher (For the belt holes.)
- Beveler
- Burnishing Tool
- Basic Sandpaper
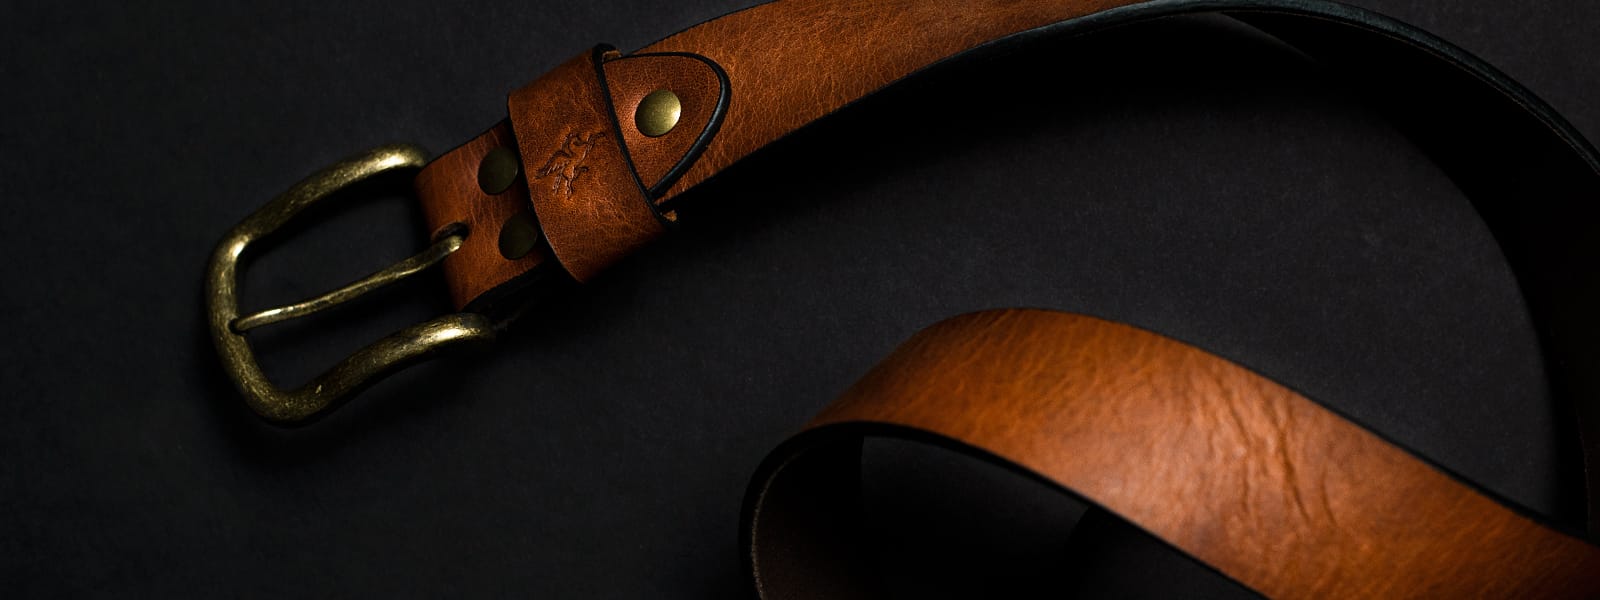
Alright! Now, we’ll select leather for this project. My core belief in this work is that good leathercrafts start with good leather, and selecting the appropriate leather for the project at hand is of the utmost importance. So, we’re making a heavy-duty double-prong belt and people use it to carry heavy hanging stuff on their belts like guns or some work equipment. So, we need to use a strong type and thick leather for this project. Thickness is one of the first things I’m going to check when I’m looking at the available options that we have here. I’m going to consider three of the very thick leather I have available at my disposal right now.
This one is about 3 1/2 millimeters (maybe like nine ounces) of chrome and vegetable (combination) tanning brown distressed leather (crazy horse). I also have two vegetable-tanned shoulders available for me. One is from Italy, a full veg tan, tumbled, black finish, distressed, and oily finish article, and a brown option which is again, a full veg tan leather from Italy. It’s a beautiful piece. This is also about eight ounces (3.2 millimeters in thickness). They will do the job just fine and they smell beautiful. So I think I’m going to go with one of these options and you’re free to choose which leather you’d like to work with as long as you’re happy with the strength of the leather you’re going with for this project.
Once we’ve made our leather selection, we’re now going to measure the buckle opening. Since it’s our main constraint, we need to measure exactly how wide the buckle we’re choosing here is. So, we have a 54mm opening here and I usually go about 2mm - 3mm less than this so my leather can fit in without any hassle. So, I’ll go for about 52mm width of leather strap and my entire design will revolve around that measure.
For the next step, when I’m working on a new design, I always sketch out the ideas I have in mind to determine what my end product should look like. So, let’s quickly sketch this belt.
Once I am satisfied with the look of this belt, I can go into Illustrator to precisely draw and make my pattern to cut my leather accordingly. The tedious measurement work is done. Hopefully, this is going to save you some time when you’re working on your project at your convenience. All you need to do is just print this out, and cut it out from the paper so that we have a pattern to work with.
We cut out the printed paper to have our pattern to work with and this is going to help us to determine where we’re going to punch our holes, how our ends look like, and where the buckle should be placed. Now, we’re going to adjust our strap cutter to the exact width of the belt that we’re working on.
Alright, we now came to the most fun part. We’re going to cut our strap out of this beautiful veg tan leather. The leather is from our friends at La Perla Azzurra, Italy in the Tuscany region. I love their leather, especially the smell. This is incredible, the best leather smell I’ve ever experienced in my life. I’m obsessed with their particular smell out of their traditional recipe of vegetable tanning. That’s kind of a personal reason why I’m going with this leather. We already have a straight edge on this leather because I cut belt straps before this one. If you’re working with a brand new shoulder or side, the first thing you’re going to do is to straighten your edge before cutting your strap. Now, we already have that step ready and we’re going to start cutting the strap for our belt.
Now, for the most fun part, we are cutting our strap out of this beautiful veg tan leather. As you know, the beginning is the tough part. But once you get it started, all you need to do is make your strap cutter latch to the straight edge. I clamped my shoulder onto the table so it doesn’t move as I stretch it down. Since this leather was on my shelf for a while (a few years to be exact), there are some roll marks that are making it a little bit more difficult to keep it under control. But this leather cuts like butter. It’s beautiful. It is the leather from La Perla Azzurra, Italy and I love the smell of their tanning recipe.
Now, we have our strap cut from the leather. I choose the better end of it for the belt tip which is the side. There are some rack marks on this end. I’m going to use it for the buckle side so it’s going to be folded and will come under the screws and the loop so it’s going to be hidden. This end is much more natural and beautiful so it’s going to be the belt tip.
Now, we’re going to mark the tip and the buckle end to finish our edges and we’re going to have a finished belt at the end. We now need to determine the size and length of the belt. Assuming some of you are following along and making your own. So probably you need to use one of the existing belts that you use comfortably, and use that for measurement. So, we’re going to lay it on the strip we just cut. Leave enough room at the tip so you can clear all that crooked ends. This is our belt tip and we’re going to start from here. We can leave it here and make a little mark on the beginning where our belt tip is going to start. Then, flat lay your existing belt on it. Now, your buckle should match with your existing belt’s buckle and that means your pattern here needs to come right along here so your buckle can sit at this length. This means that now, we need to cut out our belt at this point so we can finish our buckle at the end of the belt.
We’re going to round these corners for our belt tip. Now, we’re going to punch some holes since we’re already done with the markings. So, I’m sort of eyeballing it. It’s not a whole sponge but it’s fun and when you’re working with thick veg tan, then it is satisfactory. Alright, let’s make the prong holes with a big hole punch we have right here. They come in very handy if you have them ready. If not, you can manually open these too. A heavy hammer comes in very handy here. Yeah, we got a big hole right there and a second one coming.
Now, I’m testing my buckle in the opening and it fits nicely. This is a good time to measure and cut our loop part as well. I adjusted my strap cutters to 22mm because the length of your loop will depend on the thickness of your leather. I’d rather cut a long piece of loop leather here and manually measure it as I’m installing my buckle there or at least testing it out. Now, this is all 22mm, long enough. I’m going to go ahead and place it just as this will sit on the finished belt between two layers. Then, I’m going to bring the other end here to give the real thickness because, on the finished belt, that is where it’s gonna go. When I’m measuring it, I basically make a mark with my nail. Wherever that met the underneath part, that’s going to be my cutting point.
Okay, now it’s time to bevel our edges. I pick a thicker beveler because I’m working with thick leather. If you’re working with thinner leather, you might use a thinner version. It’s your choice and you may also choose the perfect fit for the roundness that you’re looking for. This is fun work!
After beveling the edges, we have some uneven corners here because of the hand cutting. You might want to sand it off and round it nice and even here. If there are any other loose fibers that stick out and you don’t like them, you can actually turn around the entire belt with this little sandpaper.
Now, we came to the next step which is burnishing the edges. This is completely optional. I actually really like the raw finish of this veg tan leather. I wouldn’t mind using it like this but some people really love burnishing and I want to show you as an optional step if you want to choose to do that. You might choose different items to use here but water works just fine, especially with a veg tan. You can dampen the edges a little bit with a little sponge or fabric if you’d like. Then, you’ll need a friction tool which could be a manual wood or a little machine that I have here like this. It spins at a high rate and basically creates heat on the edges closing the open leather fibers that are sticking out. So, I’m working on the loop edge first. As you see, it darkens and shines a bit because what happens is you’re closing the fiber ends with the heat created through friction here. This is a nice preferable look. We’re going to go do this all around the belt. Again, you might not do this or you can use other agents like Carnova cream or Toscanella Cream, depending on your preference.
Now, we’re making our belt loop using the little marking pattern. I’ll make a guide hole because the staples don’t go through this thick leather by themselves. I’m trying to open it as much as I can beforehand so it’s easy for the staple to reach the other side.
Now, we’re closing our loop using these little staples. I’m using two of them since this is a fairly wide 22mm (almost an inch) wide loop. I put those two in one end and then I go around and push these in. Be careful of the sharp edges that come out on the other end. You might poke your hands with it. I’ll use a needle nose plier to squeeze them on a flat and hard surface. I make sure they are all in. Once the tip of the staples is completely in, I can squeeze them in and close them up.
Now, we’re putting in our buckle, loop, and belt completely together. We’re using Chicago screws. These are ⅜ of an inch Chicago screws. It might change depending on the thickness of the leather you’re using here. So, basically, we put all the things in line where they’re supposed to be first and then we put the caps of the Chicago screws on the top. Let’s give it a little crease here. And then, we’re going to put our buckle in. I find it easier to close the buckle end and screws first. The screws look a little longer than I need but once the loop gets in between the two sets of screws on the right and left, that will make up the difference here. Okay, yeah, these are a little longer than we need here but for the sake of completion, we are going to call it complete.
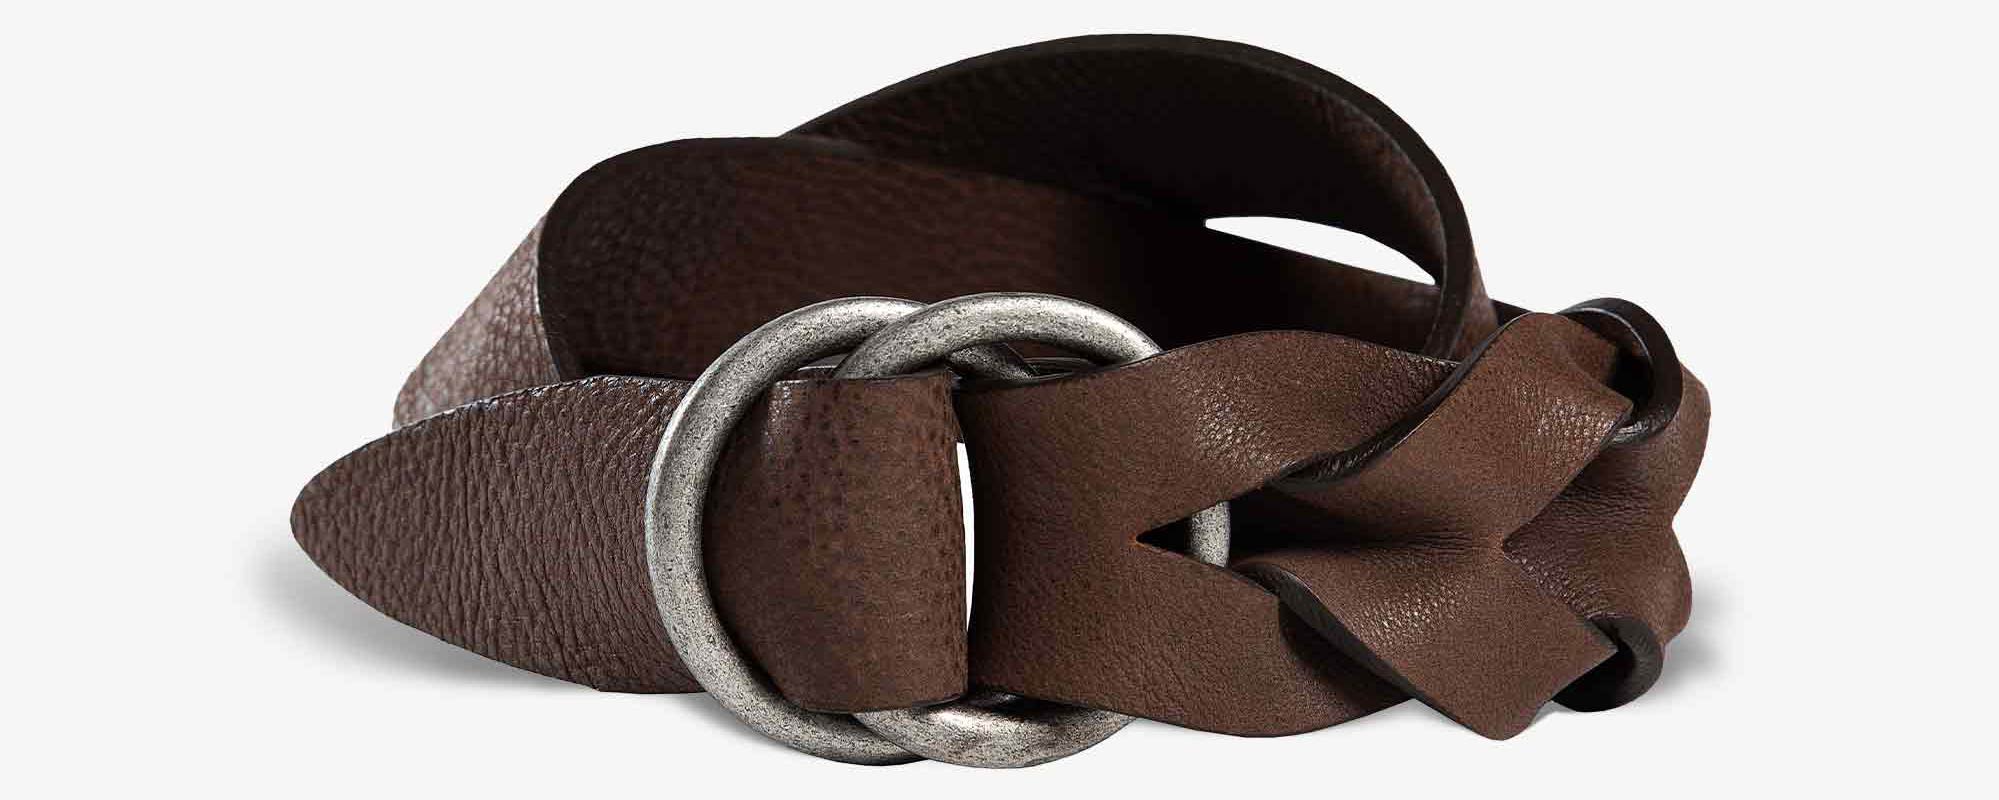
Our buckle moves easily and our prongs are sitting nicely. Maybe a little crooked but overall, our belt is complete. Alright, we have our finished belt here: heavy-duty, double-prong, Italian vegetable-tanned leather belt for your holsters or work equipment. It is actually supposed to be very heavy duty. We burnished the edges. It is made out of 3.5mm thick leather so it’s fairly, fairly, fairly strong. The buckle is steel. I would have tried it but I don’t have pants that have wide belt loops but for the sake of testing, I’m going to put it right on my belly. This is basically how your belt would look on your pants eventually.
Once we do the design, we never stop here. We always want to test the durability and we’re not scientists here. We don’t have that fancy equipment to test with numbers. What we do is abuse the products and see how much abuse they take and how durable they are. So, in the next video, we’re going to abuse this belt really well. We have some good plans to have more fun and test this belt to see how strong it is.
Thank you very much for watching. I hope you had fun with us together and hopefully, you did your own belt at home at your own convenience and you can use it for years to come. Thank you for watching again and we’re going to see you in the next video.


Leave a comment